The Golden Wrench

A blog about bicycle repair and maintenance by the mechanics at Freewheel Bike.
Showing posts with label overhaul. Show all posts

Saturday, July 30, 2011

Fun project bonanza!

I've been saving up photos for the past few weeks to compile into one big blog post about fun repairs, so hang on tight...

First, let's reach back a few decades to the Golden Age of two- and three-speed internal hubs. A customer came in with a Bendix two-speed kick-back coaster hub (Yellow Band!) that wasn't behaving itself, even after a couple attempts to service it. So I pulled it apart for diagnosis:


In the foreground notice the Bendix wrench; yes, that one end is a 47/64". After cleaning everything I was able to find the problem--a broken coupler:


Notice the missing section in the foreground, which should be a closed rectangle like the hole on the opposite side (also notice the Sutherland's manual on the bench--trade secret!).

Unfortunately, though we have lots of old Bendix parts, we have long since run out of the fragile bits, so barring some lucky Ebay searches, this wheel will have to be retired.

Next up is a suspension fork that we don't see too often around here, Fox's 36 TALAS, their big-hit, travel-adjust fork. There's all sorts of fun stuff in this fork, including the granddaddy of today's 32 FiT damper forks, the big RC2 damper cartridge. Here's everything laid out:


Lots of stuff going on there! Notice the black rubber bladder in the lower right--Fox was using their FiT dampers in the big downhill forks for years before they finally came out with a smaller, cross-country version for their 32mm forks in 2010. Both FiT systems are designed to reduce weight by minimizing oil volume. Here's a look in the end of the damper cartridge just before the bladder is installed:


Our final stop in Taking Things Apart Funland is an overhaul on an Avid Juicy Ultimate hydraulic brake lever. This brake was exhibiting all sorts of undesirable behavior, including occasionally going all the way to the handlebar without engaging the brake AND pumping up to the point that there was no lever movement. I suspected the master cylinder piston seals, as both of those symptoms suggested oil was getting around the seals. It was also leaking brake fluid from under the reservoir cap, which suggested that the rubber parts in the lever were getting tired. Here's everything exposed to the light of day:


Notice the two threaded pieces on the right--the red part threads against the worm gear below it to provide freestroke adjustment (the point in lever throw where the pads contact the rotor). This is different than reach adjustment, which sets the starting point of lever throw. Though it's becoming more and more common, typically this kind of adjustment is only seen on higher-end brakes, as it adds a lot of moving parts to the system (equals more expensive).

Well, that's all I've got for now. See you out on the trail for the Murphy Time Trial Series!

Monday, January 17, 2011

The Servicing of an Internally Geared Hub

There are many benefits of using an internally geared hub. For the most part, the unit is sealed off the elements, you can use them in a belt drive system, they shift really fast, etc. When we get one of these hubs from Shimano, or on a built bike, they come packed full of grease. With most Shimano internally geared hubs, grease is used to lubricate moving parts. However, here in Minnesota, extreme temperatures can change the way grease acts, especially when you're dealing with gears only a few millimeters in diameter.


Today we will talk about how to clean, service, and re-lubricate (with winter in mind) a Shimano Nexus 8 speed internally geared hub.


First, we need to remove the external components. Turn the shift mechanism locking to the left and the shift assembly slides right off.


Remove the cog snap-ring. This thing can be a huge pain. Unhook it from its groove and get a screwdriver under it. From there, all you have to do it walk it around till it comes off. I like to wear safety glasses of some sort when doing this. Snap-rings can be unpredictable at times.


The cog slides right off from there.


After the cog comes off, there is a dust shield and seal exposed.


Once removed, the drive side is now prepared for the cartridge to come out.


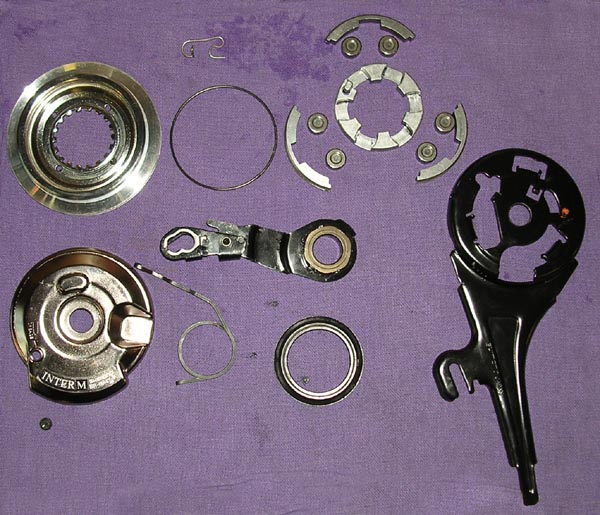
This bike is equipped with a roller brake. It's almost like a drum brake that's actuated with a hexagonal nut looking thing that 6 rollers rotate around pushing pressure plates against the inside diameter of the braking surface.

There is one nut that holds the assembly to the hub shell. Once that's removed, the whole brake comes off.


We now have access to the wench flats of the cone and lock-nut. These can be completely removed...


... And the internals are free of the hub shell!


The dirty, greasy parts get a nice hot bath in the parts washer. I usually let the cartridge sit for an hour or so to allow the old grease to break down.


Here is an exploded view after the parts are all cleaned.


Since when has Shimano made ice cream topping???


Must be "Blue Razzzberry."


The cartridge gets soaked till it's good and saturated. I usually wait till the bubbles subside.


Allow the excess to drain.


Clean the inside of the hub shell.


Apply grease to the bearings and clutch rollers. I also inject 3cc or 4cc of the special Shimano oil (ice cream topping) between the gears before putting everything back together.


Reinsert the cartridge and wipe off the excess grease.


Re-adjust bearing on the non-drive side till there is no play.


Install dust seal.


Grease back of dust shield and reinstall.


Grease the back of the cog and reinstall (We have had issues with these making noise, and grease seems to solve the problem).


Realign red dots with red, yellow dots with yellow...


... And rotate lock-ring to lock the shift mechanism in place.


It's good practice to lubricate the roller brake regularly. Squirt some special roller brake grease in the grease port.


Loosely install the roller brake. Tighten the drive side axle nut, align the reaction arm, then tighten the roller brake nut to fix it to the hub.


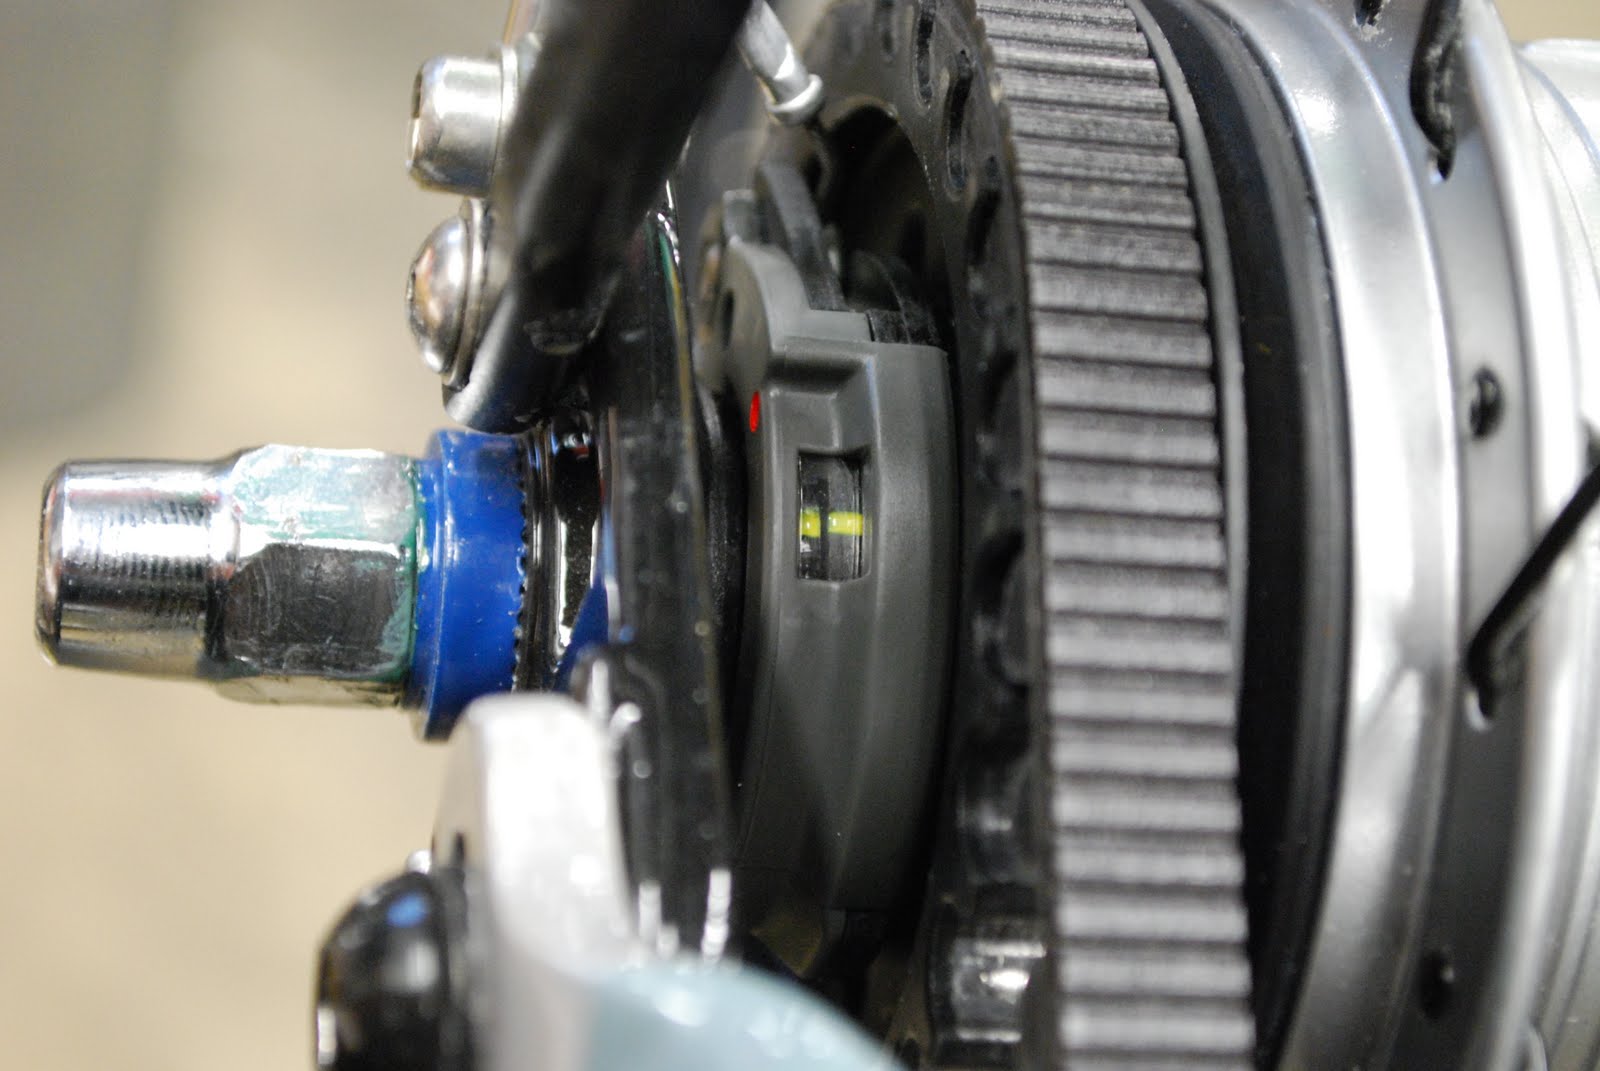
Seat the axle in the dropouts and fasten both axle nuts. Align belt if applicable. Check all the gears to make sure there are still 8 of them. If there aren't as many as when you started, something went wrong. Shift into 4th gear and use cable tension to align the two yellow marks in the window.

After performing this service, the hub felt like it shifted faster and more crisply, especially in the extreme cold. One of our year-round commuting employees, Ben, who uses the same hub described the overhaul to make the shifting "less gummy and more direct. It gives me all of it," he concluded. I'm not really sure what that last part means, but it sounds pretty positive.

Monday, January 10, 2011

Last Month for Winter Overhaul Special

We're a third of the way through January, which can only mean one thing: The Winter Overhaul Special is slowly coming to an end! If you haven’t yet, you can book your appointment online at http://freewheelbike.com/articles/schedule-an-appointment-pg490.htm , or call one of our two locations:

West Bank: 612.339.2235

Midtown Bike Center: 612.238.4447

Also, don’t forget we offer FREE PICKUP AND DELIVERY with every winter overhaul special within 15 miles – Just make sure to book your online appointment through Freewheel Mobile when given location choices. You can bring your bike in or make an appointment for in-store drop-off/Mobile pick-up through January 31st!