
 Today we will talk about how to clean, service, and re-lubricate (with winter in mind) a Shimano Nexus 8 speed internally geared hub.
 First, we need to remove the external components. Turn the shift mechanism locking to the left and the shift assembly slides right off.
 Remove the cog snap-ring. This thing can be a huge pain. Unhook it from its groove and get a screwdriver under it. From there, all you have to do it walk it around till it comes off. I like to wear safety glasses of some sort when doing this. Snap-rings can be unpredictable at times.
 The cog slides right off from there.
 After the cog comes off, there is a dust shield and seal exposed.
 Once removed, the drive side is now prepared for the cartridge to come out.
 This bike is equipped with a roller brake. It's almost like a drum brake that's actuated with a hexagonal nut looking thing that 6 rollers rotate around pushing pressure plates against the inside diameter of the braking surface.
There is one nut that holds the assembly to the hub shell. Once that's removed, the whole brake comes off.
 We now have access to the wench flats of the cone and lock-nut. These can be completely removed...
 ... And the internals are free of the hub shell!
 The dirty, greasy parts get a nice hot bath in the parts washer. I usually let the cartridge sit for an hour or so to allow the old grease to break down.
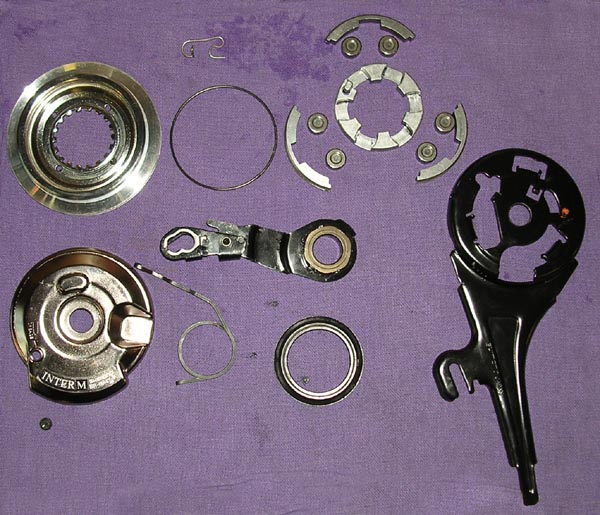
 Here is an exploded view after the parts are all cleaned.
 Since when has Shimano made ice cream topping???
 Must be "Blue Razzzberry."
 The cartridge gets soaked till it's good and saturated. I usually wait till the bubbles subside.
 Allow the excess to drain.
 Clean the inside of the hub shell.
 Apply grease to the bearings and clutch rollers. I also inject 3cc or 4cc of the special Shimano oil (ice cream topping) between the gears before putting everything back together.
 Reinsert the cartridge and wipe off the excess grease.
 Re-adjust bearing on the non-drive side till there is no play.
 Install dust seal.
 Grease back of dust shield and reinstall.
 Grease the back of the cog and reinstall (We have had issues with these making noise, and grease seems to solve the problem).
 Realign red dots with red, yellow dots with yellow...
 ... And rotate lock-ring to lock the shift mechanism in place.
 It's good practice to lubricate the roller brake regularly. Squirt some special roller brake grease in the grease port.
 Loosely install the roller brake. Tighten the drive side axle nut, align the reaction arm, then tighten the roller brake nut to fix it to the hub.
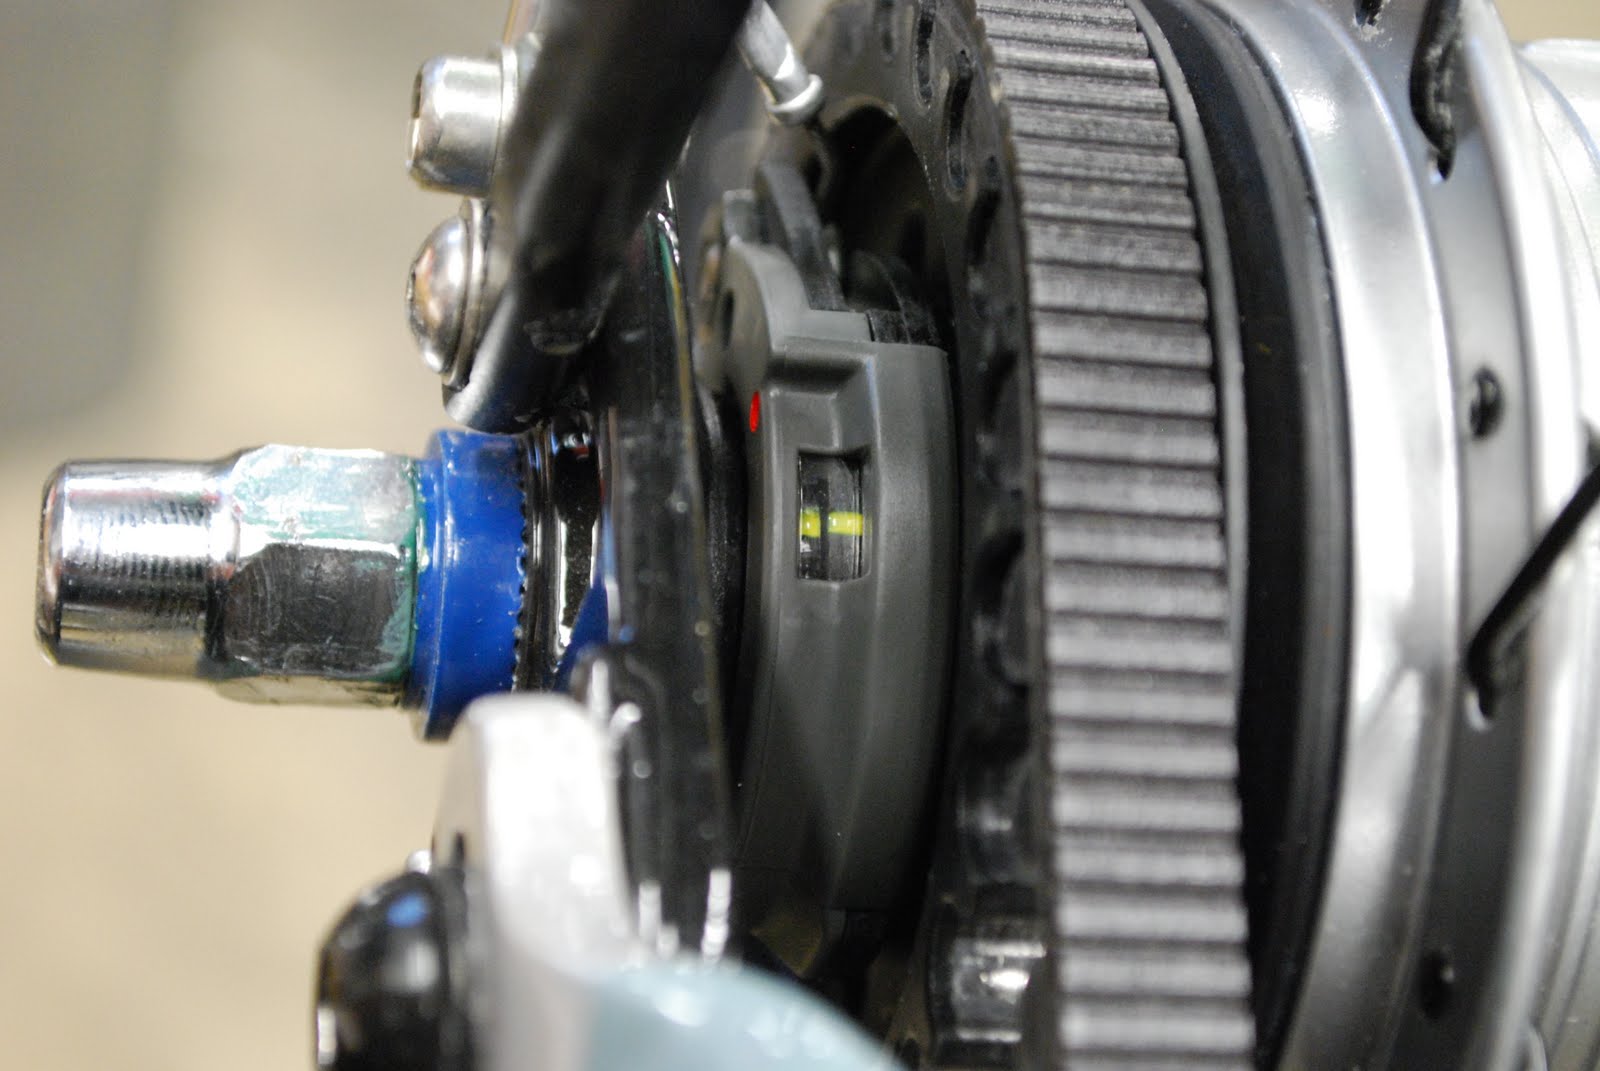 Seat the axle in the dropouts and fasten both axle nuts. Align belt if applicable. Check all the gears to make sure there are still 8 of them. If there aren't as many as when you started, something went wrong. Shift into 4th gear and use cable tension to align the two yellow marks in the window.
After performing this service, the hub felt like it shifted faster and more crisply, especially in the extreme cold. One of our year-round commuting employees, Ben, who uses the same hub described the overhaul to make the shifting "less gummy and more direct. It gives me all of it," he concluded. I'm not really sure what that last part means, but it sounds pretty positive.


